
This newsletter drop covers all the diesel heater modifications I’ve made so far on my heater. If you follow the YouTube channel, this will likely answer any questions you had about parts, how I did the upgrades, and why I did the upgrades. If you are not a subscriber but are going to buy and upgrade the Hcalory heater this will provide a good starting point and inspiration.
Why Do Upgrades
~Quick Heater Review
I bought this heater off amazon and quickly realized it is one of the best cheap heaters you can buy. However, it’s far from perfect. The main issues I’ve had with it is difficulty installing ducting to the heater outlet. There is not much room between the heater outlet and the case which makes it difficult to wrap the ducting around the outlet.

Adding ducting to heater outlet
Also, the three inch diameter of the outlet is not ideal because it causes the heater to overheat. Using a four inch diameter outlet duct solved my overheating issues. It didn’t come with a fuel filter in the fuel system and the biggest safety issue is the 12V plug they give you.
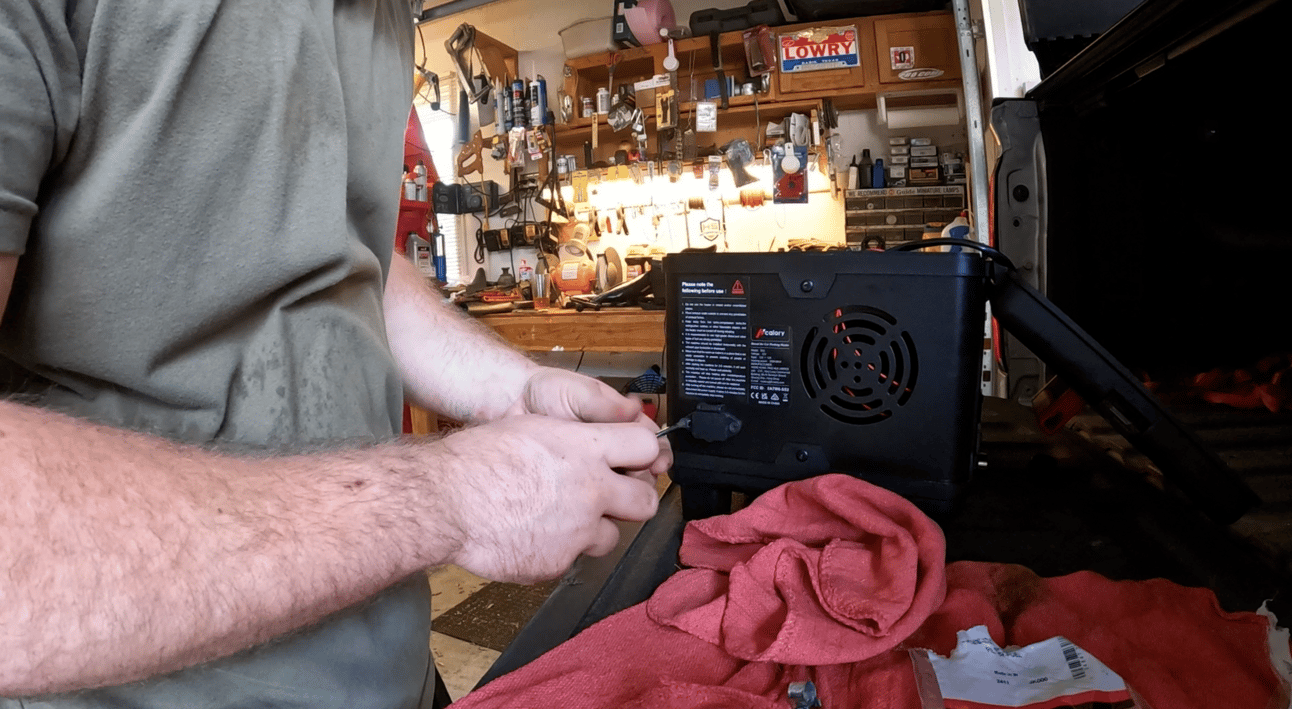
removing AC-style plug from heater
It’s an ac plug used in a dc fashion which could confuse some people leaving them with a fried heater and a possible fire hazard. Other than those previously mentioned issues this heater has been working great especially after the modifications. I love the form factor, reliability, and automatic altitude adjustment feature among others.
Upgrade Instructions
~Fuel Filter
To begin the heater upgrades I started from inside out. The first item of business was adding a fuel filter into the fuel lines. This is a pretty straightforward process with the only difficult parts being removing the fuel tank and gaining access to the heater fuel lines and then reinstalling the fuel tank to the case while at the same time connecting it to the fuel line. One caveat is if the fuel tank has fuel in it you’re gonna have to empty it before proceeding with the filter install. Once the tank was removed I disconnected the fuel line that goes from the tank to the fuel pump and cut that in half to put the new filter in the middle. I then fastened it to the fuel lines with hose clamps.
Adding fuel filter to fuel line


Once the filter is installed the next challenge is connecting the fuel line back on the tank. There is not much room to work with but with a little finesse it can be done.
~ 12V Plug
This upgrade is a little involved and I already have an idea of how to refine this upgrade as I wasn’t completely happy with how it looks aesthetically. However, it works great and is a much better design than what it came with originally. What I did with the plug is undo the connections and remove the original plug from the case.

Removing original plug
I then soldered on the new connector to the heater and the male side of the connector to my power adapter.

Soldering plug to heater
I used some scrap metal I found to cover up where the original plug was. Again, this is not the cleanest install but it has been working great this winter and I will clean it up on my next round of upgrades to the heater.
~Ducting adapter
The last upgrade that I did was very straightforward and simple but it is definitely my favorite and most useful upgrade. The biggest issue I have had with this heater is it shutting off due to overheating. A way to solve this issue is to use larger diameter ducting than what the heater outlet is. The heater outlet has a diameter of three inches, I found that by using four inch ducting it allows the heater to operate without overheating itself. By using an expander coupler I can easily attach four inch ducting to the heater outlet.

Heater Outlet Expander setup
Summary of Upgrades
~ To recap all of these upgrades, I installed a fuel filter to hopefully help with the longevity of the heater. Next was the 12v plug replacement that is a much more safe and rugged design. I will be revisiting this upgrade to refine it later this year. Lastly but not least was designing a outlet expander setup. This has been the best upgrade as it solved my overheating issues and required the least amount of effort to install.
Gear notes
~The gear notes for this newsletter edition is just all of the parts I used in the upgrades of the heater. I have not had any issues with any of them and would suggest them to anyone looking to upgrade there Hcalory SS2 heater. I hope this has provided some insight and inspiration to anyone trying to make their heater better.
Links to parts used:
Hose clamps - https://amzn.to/3M4UABj
Connector - https://amzn.to/3M3VRbO
3-inch clamps - https://amzn.to/3WNmHd6
4-inch clamps - https://amzn.to/3M5fhgl
4-inch ducting - https://amzn.to/3WM3rg9
4-inch coupler - https://amzn.to/4doGAOI
3-inch to 4-inch expander - https://amzn.to/3WHV6Kt
Hcalory diesel heater - https://amzn.to/3Alkiid
Fuel filter - https://amzn.to/4do4l9E
Amazon link = small commission. Much appreciated if used but no worries if not!
And now, dear children, continue in him, so that when he appears we may be confident and unashamed before him at his coming.
1 John 2:28
Link to video below: